Customising Website Footer Style and Content
Last updated on by Freeola Support
2 out of 2 people found this article useful.
This guide describes how to add content to, and style the footer section of websites created using our free website builder, RQS
The footer section of a page can be used to provide visitors the same information across all pages on your website. Typically this section of a page will include contact information (such as your postal address), social media links or information about your company or website that may not fit into/warrant its own page.
This short guide will explain how to customise the look of your footer and a brief outline on how to add or edit your desired content.
Within the RQS editor scroll to the bottom of any page and right-click within the footer to bring up the RQS Menu. If you are looking to alter the look or colouring of the footer, select Footer Styling, if you were wanting to add or change the information within the footer click Edit Footer Content.

The Footer Styling window will allow you to customise how the footer appears. As with any section of your RQS site you can choose to continue with the colours from your Website Colour Scheme or you can create your own.
If you would like to use something other than your Colour Scheme un-tick the Automatically style your footer using colours from your website colour scheme option. This will expand the Footer Styling window.

Backgrounds: If you would like your footer to cover the entire width of your site tick the Custom Full Width Background, if you would like your custom background to only cover whatever content you are adding to the footer tick Custom Content Width Background.
These options are not mutually exclusive; the RQS Builder allows you to use both options simultaneously, individually, or not at all.
Once you have decided where your custom background will display click the large rectangle underneath your selection. This will open the Edit Background window.
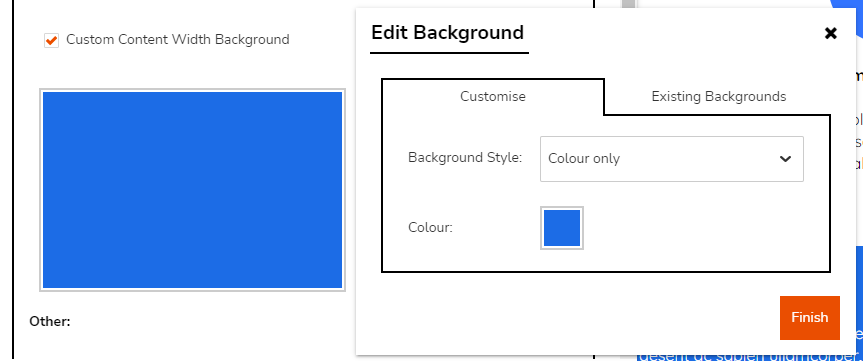
This window will offer two tabs: Customise will allow you to create a new background using either a solid colour or image and Existing Backgrounds will allow you to choose from a previously created background.
The drop-down menu on this tab provides several options:
Colour Only - This option allows a solid colour background. By default this will be the colour used in your Colour Scheme, but you can change this easily by clicking the small colour square.
Image - These options will allow you to use an image as your site background. To select your image select Image, this will open your Media Library. You can either select your desired image from this selection, select a Stock Image or use Upload Media to add a new image. You can also change your background colour should your image selection not fill all available space.
Resize to fill area - This option will resize your image to fill your background space completely. This option is not recommended for smaller images.
Fixed position sticky image - This option will expand your image to cover the background, but this will remain static when scrolling through the page content. As you will likely only see a small part of this image, this is not recommended for a footer background.
Centred at original size - This option will set your image central to the content. If the image is too small to cover the entire area, some tiling (or repeating) of the image will occur.
Tile over entire area - This option will repeat your image over the entire background area. This option is recommended for smaller, simple, images.
Custom - If you wish to further customise how your background image displays, this option allows you to do so. Recommended for Advanced Users only.
Once you have made your decision, click Finish to save.
Text Colours: If you would like to use a different colour font in your footer as the rest of your site tick the Custom Text Colours box on this window. If your footer is using a different colour background to your main site, it is usually recommended to set custom colours here.
This option will allow you to set a custom Text, Link and Link Hover colour. Simply select the colour block next to each option to open the colour picker.

Other: This short section allows customisation of the Breakpoint (The point at which your content begins optimising on smaller screens) and Padding (The size of the space between the content) of this Site Section.
Unless you have a specific reason to do so, it is recommended to leave both of these settings as Off.
Existing Designs: If you have designed content styling already within RQS you can easily select it from this tab.
Now the styling of the footer has been finalised you can add the content to this section of your website. The footer can be edited as you would any other Content Area within RQS, simply right-click a Page Element or Content Area to open the RQS menu and follow the on-screen instructions to make your changes.
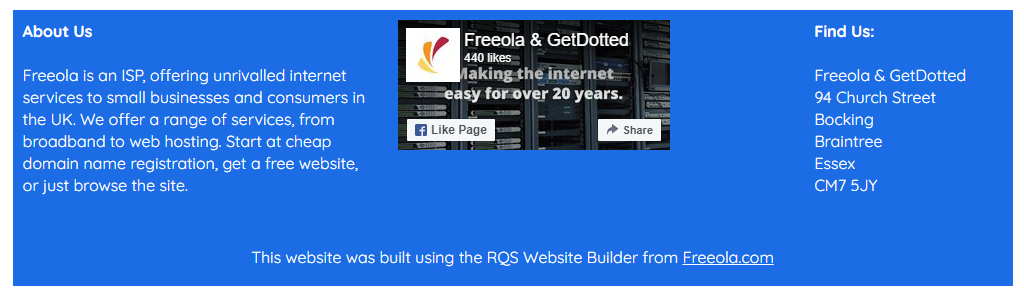
While the RQS builder pre-fills the footer with some generic content, you can remove all aspects of this and add any Page Element you like to this section.
In the below example we have removed some of the pre-filled sections, and updated the content to show Freeola & GetDotted contact information, along with a Snippet for the Freeola Facebook Page.
Live Chat is offline
Live Chat is available:
9:30am to 5:30pm Monday to Friday (excluding bank holidays).
It appears you are using an old browser, as such, some parts of the Freeola and Getdotted site will not work as intended. Using the latest version of your browser, or another browser such as Google Chrome, Mozilla Firefox, Edge, or Opera will provide a better, safer browsing experience for you.