Using OpenDNS Parental Control with Freeola
Last updated on by Freeola Support
7 out of 7 people found this article useful.
Welcome to the Freeola Support pages. This guide is designed to take you though the basic steps for configuring OpenDNS Web Filtering and parental controls for use with Freeola Broadband. For more internet help topics please visit our main Support Page.
OpenDNS are part of the CISCO group and offer free household parental monitoring which can be used to prevent users of your Internet connection from accessing websites with content that you would not like to be available, such as pornography, gambling or even social networking. If a DNS request is made for known websites of this type, the user trying to access the page is instead shown a splash page telling them that the website is blocked.
OpenDNS offer two free services, Family Shield and Home. Family Shield is pre-configured by them to block access to all adult content and can be enabled within moments, the Home service offers customisable filtering if you would still like access some of these sites.
This guide will walk you through using the Family Shield service as this should be suitable for nearly all users.
These instructions will deal with using this service on a single Windows 10/11 device. For instructions on using this with other Operating Systems or directly through your router, please see the OpenDNS Support pages.
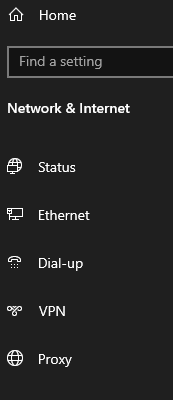
While on the Desktop, right click the Start menu and select Network Connections.
![Windows 10 Menu]()
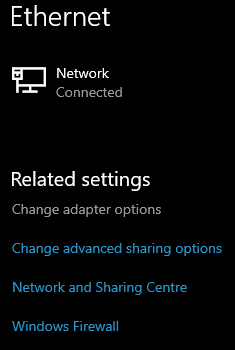
In the window that opens, on the left-hand side, click Ethernet. Now, in the main window, click Change adapter options.
![Windows 10 Network Connections]()
![Ethernet Adapter Settings]()
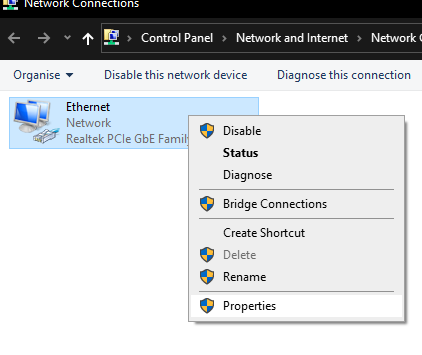
Right click the network connection you're using and select Properties.
![Windows 10 Network Properties]()
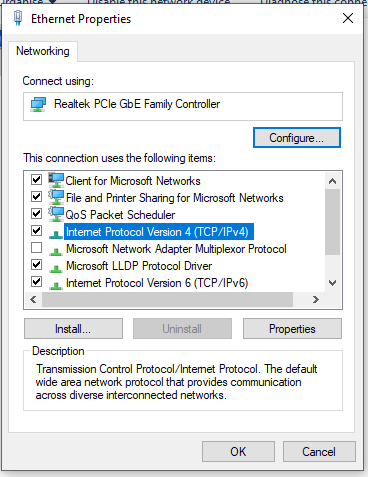
Highlight Internet Protocol Version 4 (TCP/IPv4) and click Properties.
![Windows 10 TCP/IPv4]()
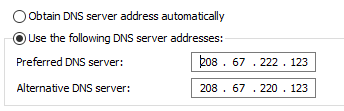
Select Use the following DNS server addresses and type the following DNS Server addresses within in the Preferred DNS server and Alternate DNS server fields:
208.67.222.123
208.67.220.123![Windows 10 OpenDNS DNS Servers]()
Click OK, then OK again to save. Finally, close the Network Connections window.

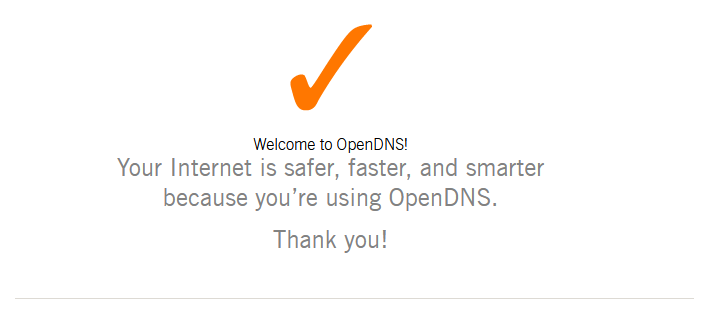
After restarting your browser, you should now Test the Connection. If everything has been added correctly, you will receive a confirmation message on screen.
Live Chat is offline
Live Chat is available:
9:30am to 5:30pm Monday to Friday (excluding bank holidays).
It appears you are using an old browser, as such, some parts of the Freeola and Getdotted site will not work as intended. Using the latest version of your browser, or another browser such as Google Chrome, Mozilla Firefox, Edge, or Opera will provide a better, safer browsing experience for you.