How to create a Blog
Last updated on by Freeola Support
2 out of 2 people found this article useful.
Important Information
This guide is for the Freeola InstantPro Website Builder. This service has now been replaced by a more modern product, RQS, and therefore is no longer updated with new features.
To build your website in RQS for free, please click here or visit the RQS Builder section of your MyFreeola Control Panel.
A Blog or Web Log is an online journal or diary, where you can post news and updates on a subject of your choice. Visitors can read comments on each post you make.
Step 1
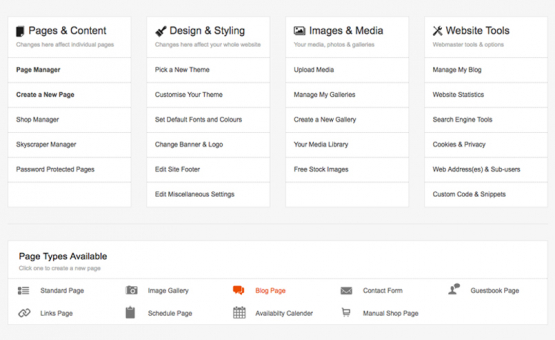
After launching InstantPro, you will be taken to the Main Menu. This serves as the starting point for managing everything on your site. Click Blog Page under the Page Types Available to get started.
Step 2
Enter your Navigation Text and Page Title. The Navigation Text will be displayed on your site navigation and is also shown in the web address for this page. The Page Title is the text that will appear in the top bar of the browser. Once completed, press the Next button.
Note: There are also some Search Engine Optimisation Options. Take a look at the Search Optimisation (SEO) Tutorial if you are not sure what to put here. 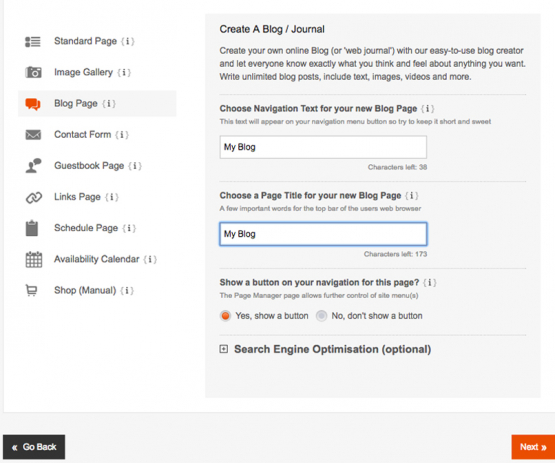
Step 3
By default, visitors can leave comments on your blog, which will be displayed immediately. Using the options at the top of the page, you can opt to pre-moderate comments before they are displayed on your site.
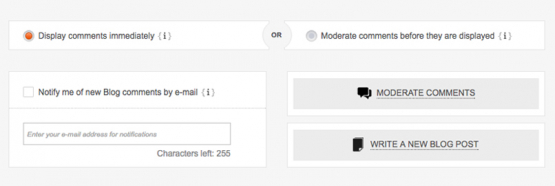
The Notify me of new Blog comments by e-mail box allows you to enter your e-mail address so that whenever someone comments on your blog, you receive an e-mail. Tick the box on the left and enter your e-mail address to receive these updates.
Step 4
Now you are ready to get started on your blog post, simply press the Write A New Blog Post button.
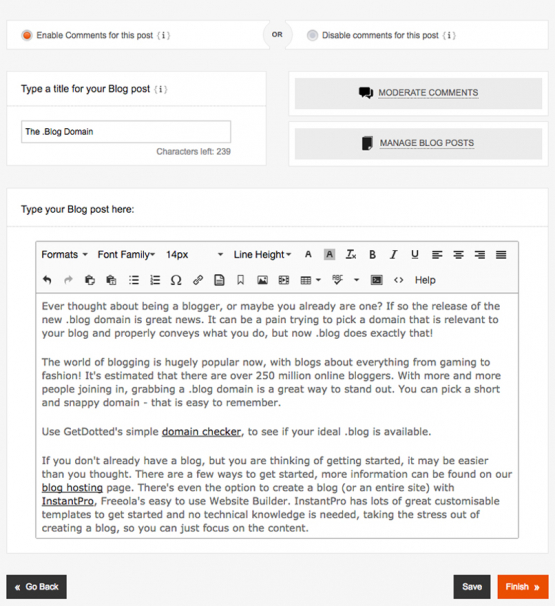
Using the options at the top of the page, you can choose to disable or enable comments for this particular post.
Enter your Blog Title, then begin to add your content into the Text Editor. You can save your content at any time using the Save button. Once you are done click Finish.
Step 5
You’re now on the Manage Blog Posts page. The Spam Options button enables you to implement spam prevention options.
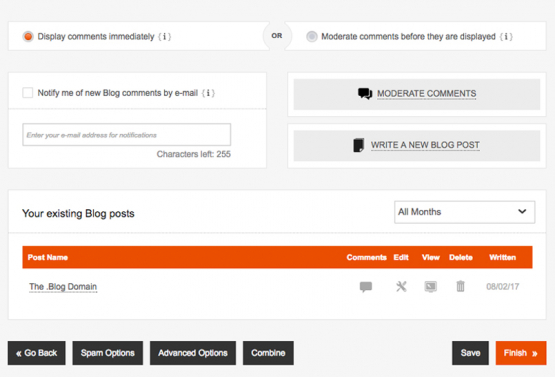
Once you are set-up, click the Finish button, you can also decide if your page is ready to go live now.
Your Blog is now complete and online! You can click Preview Page to view your first Blog post.
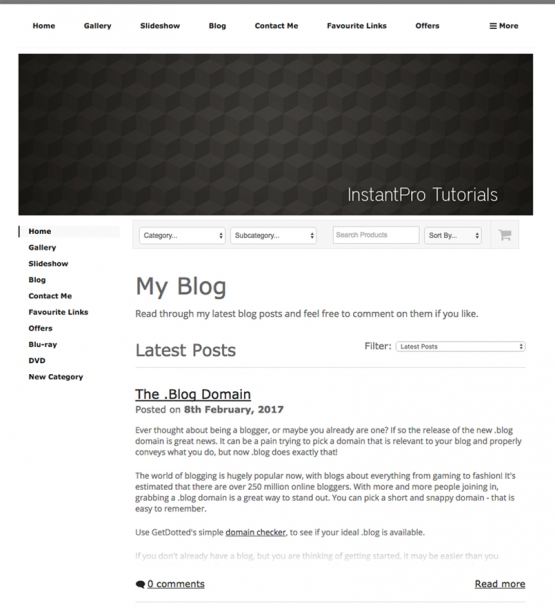
Remember that the appearance of your Blog will depend on what colours and theme you apply to your site.
Now that your Blog is up and running, you will need to know how to manage it: moderate comments, editing posts and more. Please see the Managing Your New Blog tutorial.
Live Chat is offline
Live Chat is available:
9:30am to 5:30pm Monday to Friday (excluding bank holidays).
It appears you are using an old browser, as such, some parts of the Freeola and Getdotted site will not work as intended. Using the latest version of your browser, or another browser such as Google Chrome, Mozilla Firefox, Edge, or Opera will provide a better, safer browsing experience for you.