Using Freeola Webmail
Last updated on by Freeola Support
10 out of 15 people found this article useful.
Welcome to the Freeola Internet customer support pages. This guide is designed to give some general tips for the Freeola Webmail service. For more internet help topics please visit our main Support Page.
Freeola Webmail is an easy to use web-based e-mail facility which allows you to check your new mail and send mail from any connection, anywhere in the world, from your own domain e-mail addresses. You can add Webmail with unlimited email addresses on any Freeola-hosted domain name by signing up for EmailPro or on a single free email address with the One Address service.
How To:
Once set up, webmail is accessible through your MyFreeola account or directly through a dedicated web page.
Please log into your MyFreeola Control Panel, you can click here to access the login page.
Once logged in you should see a drop-down box near the top of the screen labelled Check Your Webmail, this will open a new box. From the new drop-down menu select the e-mail address you want to check and press the Go button.

You can also access the Webmail Page directly visiting https://freeola.com/webmail/login/ or by selecting the Webmail option from the Login drop-down box found at the top of Freeola.com.
On this page you should see a 'Welcome to Freeola Webmail' message, and a prompt for your e-mail address and password. Please provide this information and then press the Log into Webmail button.

You should now be logged in to your Webmail account, where you can navigate through the messages stored on our server. To check for new messages (delivered after you have opened Webmail) you can press the Check for New Mail button from the tool bar.

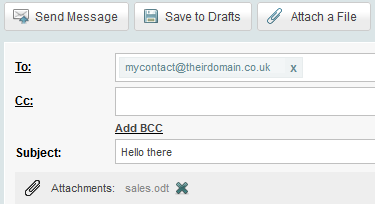
From the inbox page click the Create New Message button, the window will now refresh and provide you with the option to send a message.
From here you can insert all the necessary details into the relevant boxes to send an e-mail. If you need to send an attachment you can do so with the Attach a File button at the top or bottom of the page. Select your file from the window that opens, then Double-Click or click Open to attach the file to your message.
Please Note: Freeola recommends not to send attachments over 10MB in size.Click Send Message to send your message.
![Sending from Webmail]()
In order to send a message you started writing previously, select Drafts from the left-hand menu and select your message from the list. This will open the message and allow you to continue where you left off.
If you no longer require this message, simply select Discard Message to permanently delete this.

If you no longer require a message within your Inbox or subfolder you can delete this either from within the message itself by selecting the Delete option or from the Folder Overview by clicking the tickbox next to the message and selecting the Delete Selected option.
If you would like to delete multiple messages at once you can tick the same box next to each message before selecting Delete Selected. If you would like to remove all messages on the page (25, 50, 75 or 100 depending on your settings) click the box on the green bar at the top of the folder (highlighted below) to automatically tick every message before clicking Delete Selected.

Regardless of how you choose to delete your messages any message you delete will be first moved to the Deleted folder, where it will be stored for 30 days before being permanently deleted automatically.
If required, you can manually remove these by selecting the Clear all mail from the Deleted, Trash, Deleted Messages, Bin and Junk Email folders found at the top of this folder.

Freeola Webmail offers a few different ways to help reduce the amount of 'Spam' mail you receive to your Inbox.
By default, the filtering level on your account will be set to 5 (on a scale of 1 to 9) which will help prevent any reasonably suspicious messages appearing within your Inbox. If you would like to increase or decrease this setting you can do using an easy 'slide scale'.
To change this setting, click Settings and then Spam Control either from the main menu or tabs across the top of the screen.
Use the on-screen slider to adjust your filtering level. Please note, while selecting a higher level will mean you'll receive less unwanted mail, this does also increase the chance that legitimate mail will be missed.

By default, all messages picked up by this filter will be moved into the Spam folder. If you would like to change this behaviour you can instead select the option to still deliver the messages into your Inbox, but have suspected unwanted messages mark with [SPAM].
Once you have made your selections, select Save and Finish.

If you would like either completely block a specific address from sending to your account, or wish to ensure that messages from a specific location are always delivered to your Inbox, Freeola Webmail allows you to do so via Blocked and Always Allowed lists.
To access this feature select Settings and then Allowed/Blocked from the main menu or top tabs.
To block a sender, select Block New Address to open the Add Blocked Sender window. In this window you will be able to block a specific e-mail address or an entire domain name. You will also be able to either 'Bounce' or 'Drop' messages received from accounts on this list.

To ensure that a specific e-mail address or domain name always has its messages received in your Inbox, select Allow New Address. On the resulting pop-up window simply enter the address/domain and click Add Allowed Sender.
If you set your Spam Filtering to Level 9, these Allowed Addresses will be the only ones that reach your Inbox
You can view existing Blocked and Allowed addresses from the Blocked Senders and Always Allowed Senders tabs on this same page. From these tabs you will be able to remove or edit your existing records.
Once you have added, removed or edited your records, click Save & Finish to save your changes.

If you wish to set rules for your account to automatically move messages into folders as soon as they are received you can do so from the Message Filtering option in the Settings menu.
To set a new rule, click Create New Rule. This will open up a pop-up window that will offer you options on how you would like the rule to work.

On this window you can filter your messages using the fields provided:
Message Field: Your message can be filtered via either the message Subject Line or Sender's Email Address.
Comparison: Use this field for a partial (Contains) or exact (Matches) matches of your chosen filtering text.
Value: Enter the address or phrase you would like to filter by here. For example, [email protected] or Freeola Support.
Move to Folder: Select the folder to which you would like to move messages that meet the above criteria.The short paragraph on this window will confirm what this rule will do. If this is correct select Add Rule.
You will be taken back to the Filtering Rules page where your new rule will be displayed. If you have multiple rules you can use this page to set the priority, edit the rules, or remove the rule completely.
Once done, click Save & Finish.

Freeola Webmail allows you to create a list of Contacts to allow you to quickly send messages to people you are in regular correspondence with. These contacts can be created individually or imported from another mail software through the use of a .CSV file.
To access the Contact list, select Contacts from the top right-hand corner of your Webmail page. To start adding your contacts, click Create New Contact on this page.
The window that opens will allow you to add your contact.
Contact Name: Enter the name you would like to use to identify this contact.
Detail Type: You can apply several different types of address to a contact (Home, Work or Other e-mail addresses or phone numbers, for example) through the use of this drop-down menu.
Save Contact will allow you to save this information into your Contact List.
If you have a Contact List or Address Book from another Webmail account, or mail client on your computer, you can import this from the Import Contacts option on this page.
Please Note: You are only able to import information in the format of a .CSV file.
If you regularly send messages to a group of people at once, you can also create Groups within this section. To start this process, select Create New Group.
On the pop-up window you will be prompted to give name your group in the Group Name field, and select contacts to be part of this group by ticking the box next to their Contact List entry.
If you have a large number of Contacts on this list, a search box is provided to help filter these. Once you have named your group and decide on its members, click Save Group.Regardless of how you added your contacts these will now appear within your Contact List, from where you can view, delete or edit these. To remove a contact, tick the box next to the Contact and click Delete Selected (as you would with e-mail messages) or by clicking the Delete icon. You can edit the Contact by clicking the Edit icon.
Click Finish to save your changes and return to your Inbox.

Freeola Webmail allows you to set a signature to appear at the bottom of e-mails you send.
To access this feature select Settings from the top right-hand corner of the Webmail page, then Message Formatting Controls or Message Format from the following page. Scroll to the section headed E-mail Signature.

This section will allow you to select one of three options:
- I do not want an e-mail signature... is the default setting and will mean no message you send will have this information attached.
- Add an e-mail signature to new outgoing e-mails: will add your chosen signature to new messages only. Any message you 'Reply' or 'Forward' will not include your signature.
- Add an e-mail signature to all outgoing e-mails: will add your chosen signature to new, forwarded, and reply e-mail messages.Once you have selected your desired option you will be able to add Your Signature Text and/or Your Signature Image in the provided fields.

You can use the text editor to format and style your signature using the options provided.
Please Note: If you choose to upload an image to your signature this must be a .jpg, .png or a .gif file and less than 48kB.
Once you are happy with your choices, scroll to the bottom of the page and select Save and Finish.


Live Chat is offline
Live Chat is available:
9:30am to 5:30pm Monday to Friday (excluding bank holidays).
It appears you are using an old browser, as such, some parts of the Freeola and Getdotted site will not work as intended. Using the latest version of your browser, or another browser such as Google Chrome, Mozilla Firefox, Edge, or Opera will provide a better, safer browsing experience for you.