Setting up Freeola Email in Windows Live Mail
Last updated on by Freeola Support
4 out of 7 people found this article useful.
This guide is designed to help with setting up a Freeola email address within Windows Live Mail. For more internet help topics please visit our main Support Page.
These instructions should be relevant to all versions of Windows Live Mail, before it was discontinued by Microsoft. There may be slight visual/wording differences between versions, but the underlying procedure is the same.
Before Continuing
Please visit your MyFreeola account and make a note of the following information before continuing, you'll need to know this for later on in the guide:
1 - What protocol your e-mail address is set up to use (IMAP or POP3).
2 - What service is assigned to your e-mail address (EmailPro, Free Email or One Address).
3 - Your e-mail address password.
You can find this information by clicking Email Settings in the left-hand navigation in MyFreeola, then My Email Addresses. You should then be able to click Settings & Features button next to the relevant e-mail address to view all required email settings.
Load Windows Live Mail.
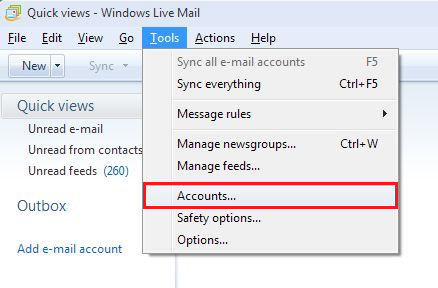
From the top menu bar select Tools, and then Accounts.
If you are unable to see this bar, press the ALT key on your keyboard to make it visible.![Windows Live Mail Tools Menu Windows Live Mail Accounts]()
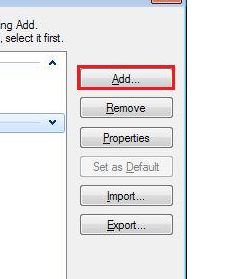
From the new window that opens, click Add.
![Add an Account to Live Mail Windows Live Mail Add Account]()
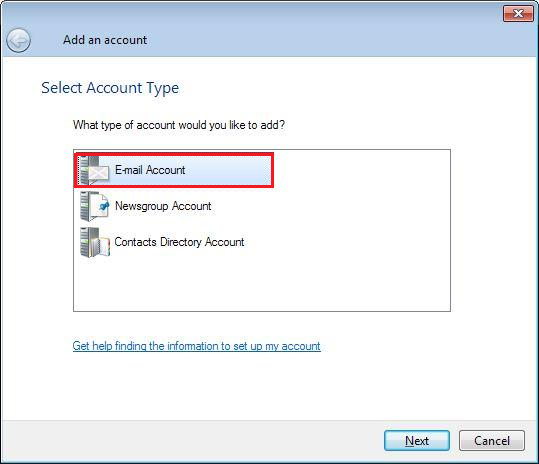
Highlight Email Account, and then click Next.
![Select your Account Type Windows Live Mail Account Type]()
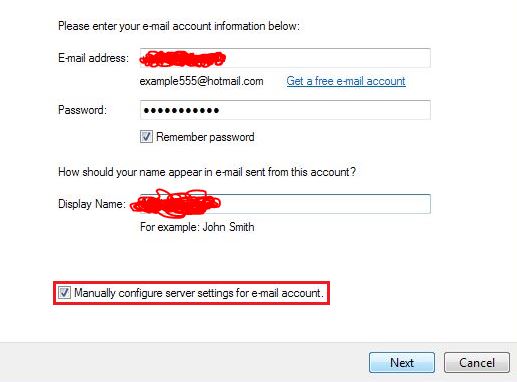
Enter the following details:
E-mail address: Your full Freeola email address.
Password: Your email password as was listed in your MyFreeola account.
Display Name: Your name as you would like it to appear on emails you send.
Ensure that Manually configure server settings for e-mail account is ticked, and then click Next.![Add your Account Information Account Information Live Mail]()
On the following screen, enter the information you gathered from your MyFreeola account earlier:
My incoming server is a: Select POP3 or IMAP depending on the type of account you have.
Incoming server: should be in the format of yourdomainname.freeolamail.net where 'yourdomainname' is your domain name with any dots ( . ) replaced with hyphens ( - ).
For example, if your domain name was freeola.co.uk, the incoming mail server would be freeola-co-uk.freeolamail.net.
Incoming port: 993 (IMAP) or 995 (POP)
Server requires a secure connection (SSL): Ticked
Log on using: Clear text authentication
Log in ID: is the full e-mail address you are adding.
Outgoing server: smtp.freeolamail.net.
Please Note: This Outgoing/SMTP server is only accessible if you are subscribed to our EmailPro or One Address services or are using a Freeola Internet connection.
Outgoing port: 465
Server requires a secure connection (SSL): Ticked
Outgoing server requires authentication: TickedClick Next, and then click Finish to complete the set up process.
If you have any messages on the server, these should automatically download or you can manually check for these using the Send/Receive or Sync buttons.


