Changing Pluscom AWR-7200 DNS servers
Last updated on by Freeola Support
Welcome to the Freeola Support pages. This guide is designed to take you though the basic steps for changing your DNS server settings within the Pluscom AWR-7200 router. For more internet help topics please visit our main Support Page.
These instructions apply to the Pluscom AWR-7200 ADSL Modem Router. The settings may also apply to other Pluscom routers.
Firstly you will need to Log-in to your Router Control Panel, this is a control panel held within the router itself and can be accessed by visiting the router's address using a web browser (such as Microsoft Edge, Firefox or Chrome).
The default address for a Pluscom router is 192.168.1.1 however this may differ if it has been changed manually by yourself or your network administrator.
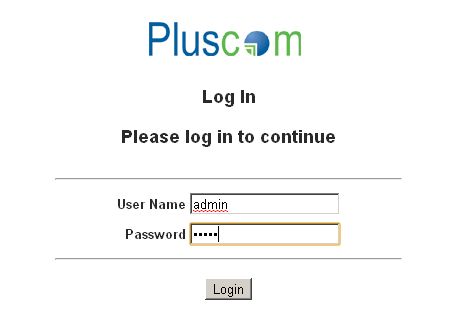
Bring up a Web Browser and Type http://192.168.1.1 into the Address Bar at the top of the screen.You should now be prompted for a username and password to log-in to the router. At the log-in prompt, enter admin as the Log-in Username, Enter Your Log-in Password into the box provided and select Log-in. If your log-in is successful, you should be taken to the router status page.
If your router was configured by Freeola or the router has recently been factory reset, the password would have been set to 'admin'. Alternatively, if you, or your network administrator originally configured the router, you may have set your own login password.![Pluscom Router Login Pluscom Router Login]()
Once logged in you will need to select Advanced setup to be taken to the main configuration screen for your router.
![Pluscom Router Stats Pluscom Router Stats]()
From beside the top LAN Configuration on the right hand side, select Configure.
![Pluscom ISP Settings Pluscom ISP Settings]()
Enter the required DNS Servers into the boxes provided. For OpenDNS these are 208.67.222.222 and 208.67.220.220, Google DNS are 8.8.8.8 and 8.8.4.4.
![Pluscom Advanced Settings Pluscom Advanced Settings]()
Select Apply to save the settings so that they take effect. As the changes have been made to the DHCP configuration, your computer will not notice the effects until you Reconnect to the Router. In order to reconnect to the router, you can either disconnect the cable or wireless, then reconnect, or restart either your computer or router.
Once reconnected, in to order ensure your new DNS settings are working correctly, you should attempt to bring up a web page, for example https://freeola.com.
Live Chat is offline
Live Chat is available:
9:30am to 5:30pm Monday to Friday (excluding bank holidays).
It appears you are using an old browser, as such, some parts of the Freeola and Getdotted site will not work as intended. Using the latest version of your browser, or another browser such as Google Chrome, Mozilla Firefox, Edge, or Opera will provide a better, safer browsing experience for you.


