Changing DNS server settings in Mac OS
Last updated on by Freeola Support
2 out of 2 people found this article useful.
Welcome to the Freeola Support pages. This guide is designed to take you though the basic steps for changing your DNS server setting within Mac OS. For more internet help topics please visit our main Support Page.
This guide was created using Mac OSX.
While some text and images may look different, the same steps will apply to other versions of the software.
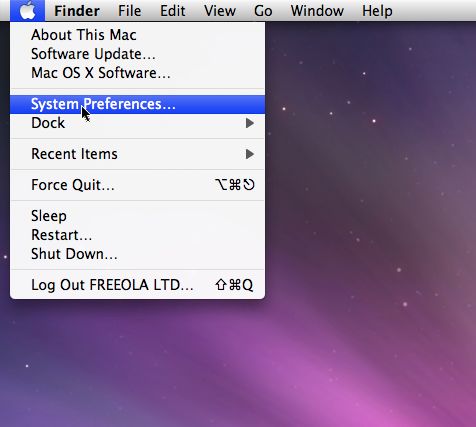
Firstly select the Apple Icon in the top left of your screen and select System Preferences. This will take you to the System Preferences screen where you are given access to many of configuration options within Mac OS X.
![Mac OS System Preferences Mac OS System Preferences]()
From the System Preferences screen you will need to click on Network, this will take you to the Network Configuration screen.
![Mac OS System Preferences Mac OS System Preferences]()
Within the Network Configuration screen you will see all your different network connections in the left sidebar, select your current connection from this list.
You will know which connections you are currently using because they will have a green circle, while the connections you are not using will have a red circle.
![Mac OS Network Mac OS Network]()
Click Advanced, then DNS from the window that opens. Now click on the Plus Icon (+).
![Mac OSX DNS Change]()
Now enter your new DNS addresses. You will need to enter both a primary and a secondary DNS address.
Common Public DNS have been listed below, although you are not limited to using these:
- OpenDNS: 208.67.222.222 and 208.67.220.220.
- Google DNS: 8.8.8.8 and 8.8.4.4.
- Cloudflare: 1.1.1.1 and 1.0.0.1.Once you have entered your DNS, click OK. The Advanced window will close, and you will be brought back to the Network window.
To save and finish, click Apply. This change should take effect immediately.
In order to ensure your new DNS setting is working correctly, you should attempt to bring up a web page, for example Freeola.com.
Live Chat is offline
Live Chat is available:
9:30am to 5:30pm Monday to Friday (excluding bank holidays).
It appears you are using an old browser, as such, some parts of the Freeola and Getdotted site will not work as intended. Using the latest version of your browser, or another browser such as Google Chrome, Mozilla Firefox, Edge, or Opera will provide a better, safer browsing experience for you.


