Hitachi Router Setup Guide
Last updated on by Freeola Support
Welcome to the Freeola Internet customer support pages. This guide is designed to help with setting up your Freeola 2-Port, Wireless and VoIP Router to work with Freeola Broadband. For more internet help topics please visit our main Support Page.
Your router may need to be configured with a few details before it can work with Freeola Broadband. The router is configured via a web browser such as Firefox, Google Chrome or Microsoft Edge.
Connect your router to the telephone line using an RJ-11 cable and microfilters.
Now connect the router to at least one computer via an ethernet cable (we do not recommend using the USB option). The network connection on the computer should be set to automatically look up an IP Address via DHCP (don't worry, if you're using a modern version of Windows and you've never used your network connection before, it's most likely already set up to do this).
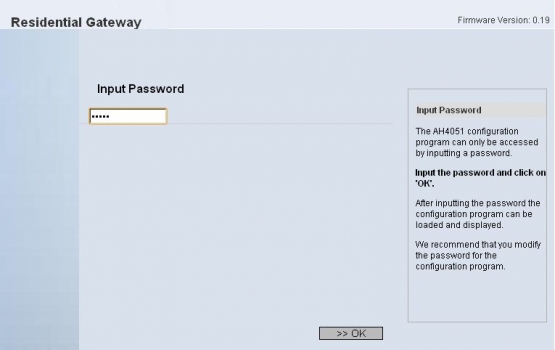
On the computer connected to the router, load your internet web browser and visit the following internet address: http://192.168.2.1. This will open up the router's own configuration pages. You will need to type in the default password to access it.
Where the router has been sent by Freeola, the password by default is admin. However if you have carried out a factory reset the password will be 0000.![Hitachi Log-in Password Hitachi Log-in Password]()
![Hitachi Gateway Hitachi Gateway]()
Select WIZARD from the left hand menu. This will guide you through the rest of the set-up.
The first page will allow you to change the password to access the router. If you choose to carry this out please make a note of this change. If you do not wish to change the password to access the router select Next.
On the following page please select Skip AutoScan and select Next.
The wizard will then ask you to select a WAN mode. Ensure that the option PPPoE/PPPoA is selected and then select Next.
This next page asks you to input your broadband log-in details.
![Hitachi ADSL Settings Hitachi ADSL Settings]()
On dispatch from Freeola your router will have been pre-configured to your log-in details and these will appear within the correct fields until changed, or the router is reset to factory default settings. Please ensure that these fields correspond as follows:Username: provided in your broadband welcome email in the format: [email protected] or [email protected]
or [email protected].Password: Your password provided in your broadband welcome email and also listed within MyFreeola.
Password Repeat: Re-type your password.
Server Name: Leave Blank.
PPP Protocol: PPP over ATM.
ATM VPI: 0.
ATM VCI: 38.
The Router Settings section should be left to default settings and read 0 in all fields. Please ensure that Auto Connect is selected and that Idle Time reads 9999. The settings here need only be changed for advanced users.
Once you have checked these settings select Next to continue.On this next page you will decide the SSID of your wireless network. This is down to your own preference, by default it is set to Freeola, after a factory reset it is set to WLAN. If you do not wish to set-up a wireless connection select SSID Hide.
Once complete select Next.On the following page you can configure your wireless encryption option. Freeola pre-set sets your router to use WPA/WPA2 Pre-shared Key. Other options are down to your preference. We do not advise you to use the Disabled option as this case lead to unauthorised access of your wireless network. Once chosen select Next.
This next page will ask you to input a password for your encryption. Included with a router which has been pre-set by Freeola will be a pre-configured Key. You are free to change this. With a WPA/WPA2 Pre-Shared Key the passphrase may be from 8 to 63 characters.
The next page begins a wizard for VoIP set-up. For the purposes of this guide please select Set up later then select Next.
The following page configures an analogue telephone connection. With this option enabled you can attach a normal telephone into the router and use it as normal. Select Next.
On the final page select Save. The router will then apply the new settings. Once a connection is established the DSL LED should be lit solidly and the WAN LED should flicker.
Congratulations! Your router is now set-up ready to use Freeola Broadband.
Live Chat is offline
Live Chat is available:
9:30am to 5:30pm Monday to Friday (excluding bank holidays).
It appears you are using an old browser, as such, some parts of the Freeola and Getdotted site will not work as intended. Using the latest version of your browser, or another browser such as Google Chrome, Mozilla Firefox, Edge, or Opera will provide a better, safer browsing experience for you.


