Trendnet ADSL Router Setup Guide
Last updated on by Freeola Support
Welcome to the Freeola Internet customer support pages. This guide is designed to help with setting up your Trendnet Router to work with Freeola ADSL Broadband. For more internet help topics please visit our main Support Page.
Although this guide is specifically written for the TEW-658BRM 300Mbps Wireless N ADSL2/2+ Modem Router, these instructions apply to the majority of Trendnet ADSL Modem Routers. The method and settings may vary slightly depending on model.
Your new router needs to be configured with a few details before it can work with Freeola Broadband. The router needs to be configured via a web browser, for example Microsoft Edge, Firefox or Safari.
Connect your router to the master telephone socket within your premises using the leads and microfilers supplied.
Now connect the router to at least one computer using an Ethernet Cable. The network connection on the computer should be set to automatically lookup an IP via DHCP (don't worry - if you are using a modern version of Windows and you've never used your network connection before, it's most likely already set up to do this).
On the computer connected to the router, bring up a web browser and enter http://192.168.10.1 into the address bar. This will take you into the remote control panel for your router.
You will be prompted for the username and password to access your router, by default, both the username and password should be admin. Enter this into both fields and press OK to continue.
![Trendnet Login Trendnet Login]()
You should automatically taken into the setup wizard. On the MultiPVC page that displays, select PVC0 and press Next to continue.
![Trendnet Multipvc Select Trendnet Multipvc Select]()
On the Determine Connection Method page, you should select Manual Selection and press Next.
You will then be taken to the Internet Settings page where you are asked for the type of Internet connection that you will be using. On this page, select PPPoA (RFC-2364 PPP over ATM) and press Next.
![Trendnet Internet Settings Trendnet Internet Settings]()
You will then be given several to options relating to the Internet connection. These should be set as follows:
Enable AutoPVCle Disable VPI 0 VCI 38 Encapsulation VCMUX ATMQoS UBR Peak Cell Rate 6000 Enable Default Vlan Disable PPPoE PassThrough Disable On the page headed PPPOA, you should enter the settings as follows:
*In these fields you will need to enter your Freeola broadband username and password. The username will be in the format of [email protected], [email protected] or [email protected]. If you do not have these settings to hand, they can be obtained by logging in to your MyFreeola account and selecting Broadband Details & Usage from the left-hand navigation.State of Connection Enable IPMode of Connection Dynamic Name PPPOA NAT Enable User Name *see below User Password *see below Confirm Password *see below Max MRU 1492 DNS Enabled Enable DNS Override Allowed Disable DNS Server 1: DNS Server 2 Connection Trigger AlwayOn Idle Disconnect Time 0 LCP Interval 5 Proxy ARP Enable Unticked
If you then press Next, you will be taken to the next stage.Now you will be asked to configure the wireless settings for your router. These should be set to your preference, however there is more information relating to each setting below.
Device - This setting determines whether the wireless functionality on the router is enabled. If you do not wish to use the wireless, you may prefer to set this to Disabled.
SSID - This is the name that will appear for your router in the list of available wireless networks.
Wireless Channel - There are several different wireless channels available, if you are encountering wireless issues, you may wish to try changing this setting, otherwise this can be left on the default.
Wireless Mode - This can be left as default.
Once all settings are as required, press Next to continue.If you have wireless enabled, you will be taken to the Security Configuration. The recommended settings are as follows:
*The passphrase will need to be invented at this point. Any devices that then connect to your wireless router will prompt for this password before being able to connect.Security Mode WPA2 Authentication PSK Encryption Type AES Group Rekey Time Leave as default Confirmed Passphrase *see below
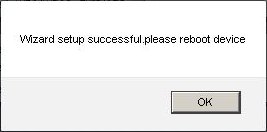
Press Next to continue.You will then be shown a series of popup windows to confirm the changes and restart the router. Press OK, Reboot, OK, then OK again. The router will take some time to reboot, once complete press Finish.
![Trendnet Setup Complete Trendnet Setup Complete]()
Your router should now be configured and ready for use. To confirm this, you can visit a webpage such as https://freeola.com.
Live Chat is offline
Live Chat is available:
9:30am to 5:30pm Monday to Friday (excluding bank holidays).
It appears you are using an old browser, as such, some parts of the Freeola and Getdotted site will not work as intended. Using the latest version of your browser, or another browser such as Google Chrome, Mozilla Firefox, Edge, or Opera will provide a better, safer browsing experience for you.


