Adding a Blog Section
Last updated on by Freeola Support
The RQS builder helps you to easily design your pages with the addition of Page Sections. These Page Sections can be added almost anywhere on your website giving you the opportunity to make something really unique.
This guide will outline how to add, edit, and make use of one of these Page Sections, Blog.
A Blog can be used to let everyone know exactly what you think and feel about anything you want. The RQS Blog Section allows you to create a blog page, and write unlimited blog posts, including text, images, videos and more.
The following guide assumes you are adding a new Section to an existing page. If you are creating a new page and using a Blog Section as a starting point, the following process is exactly the same.
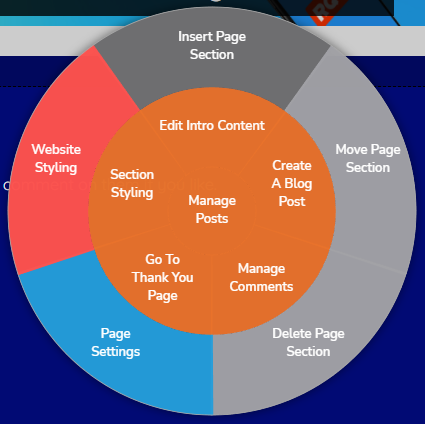
To add a new Page Section to your page Right-Click any area within your content to open the RQS Menu, then select Insert Page Section. From the secondary menu that opens, choose where you would like the section to initially appear. You can either Insert Section Above or Insert Section Below the selected location.
This placement isn't final, you can still move your Page Section once created.


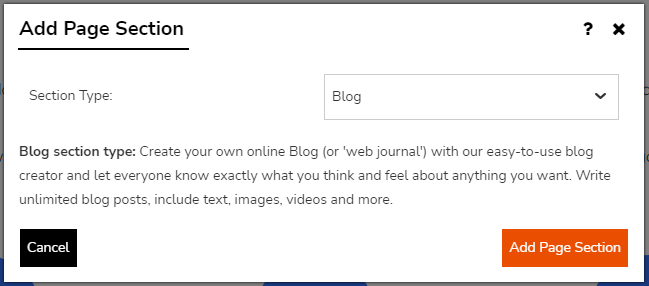
Once you have chosen your initial placement the Add Page Section window will open allowing you to select a Section Type. For this guide, we are selecting Blog. Click Add Page Section to continue.
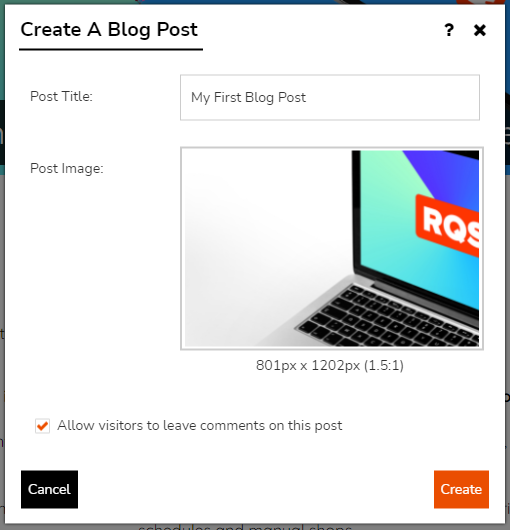
Once you have added your section the Create A Blog Post window will open, allowing you to create your fist blog post.
The Create A Blog Post window provides three options:
Post Title - The title you would like to give your post. Typically this should be an outline of the post, or a catchy title to entice the reader to view the post in full.
Post Image - This section will allow you to add an image to your Blog Page. Using an image connected to the content of your post could further help readers find your main post. To add an image click the large space within this section, this will open your Media Library allowing you to choose an image already in-use on the site, an image from the Freeola Stock Image Library and also give you to the option of uploading a new image.
Allow visitors to leave comments on this post - This option will define if readers of your post can comment on it afterwards. A tick in this option will enable this feature and allow comments, no tick within this option will prevent any comments being left.
Once you have entered your desired information, click Create.
Writing Your Blog Post
Once you have created your Blog Post you will be taken to the Page with the Blog Content highlighted for editing already. If this is not selected, simply Right-Click the area then Post Content.
The Content Area of your Post can be edited in the same way as any other Content Section of the site. A full in-depth guide on adding information to this section type can be seen on our Content Section guide.
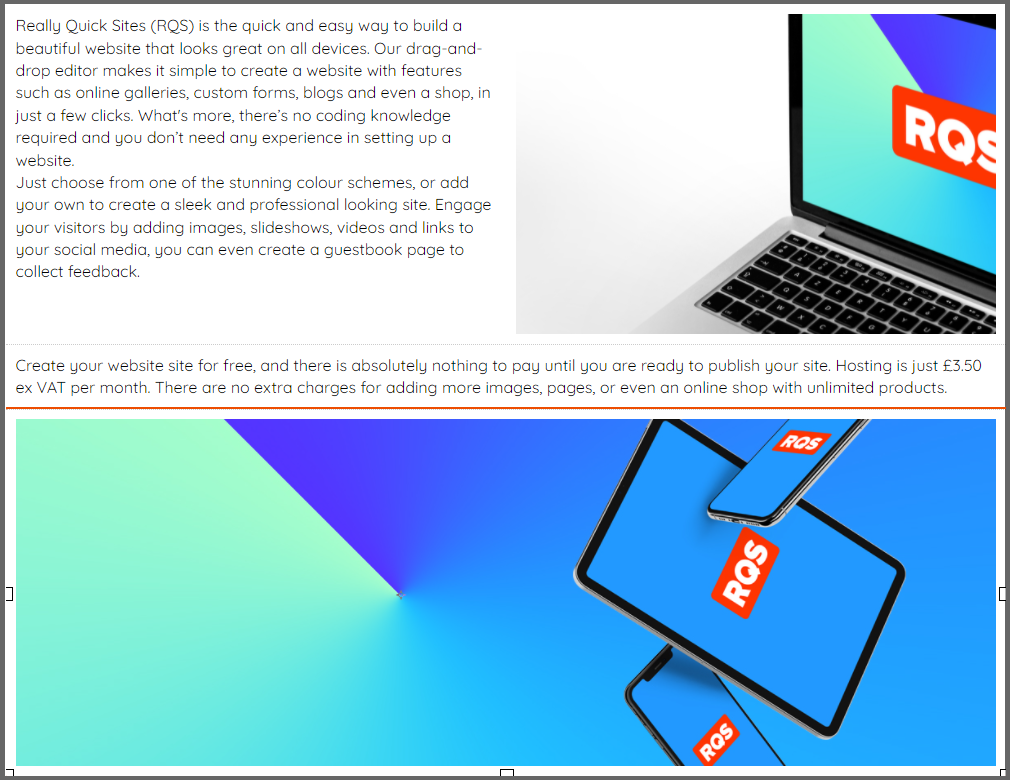
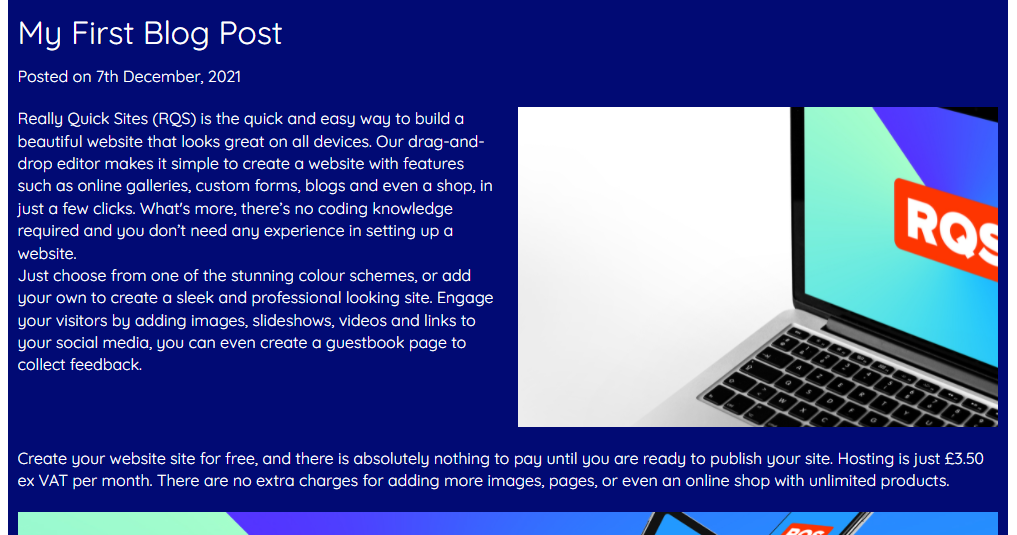
However, briefly, your Blog post will include the image you added in the previous window (if applicable) and three Text Area Elements. If you wish to simply edit the default text you can do so easily by Right-Clicking the area and selecting Edit Text Area. If you wish to remove a Text Area completely select Delete Text Area from the Right-Click Menu.
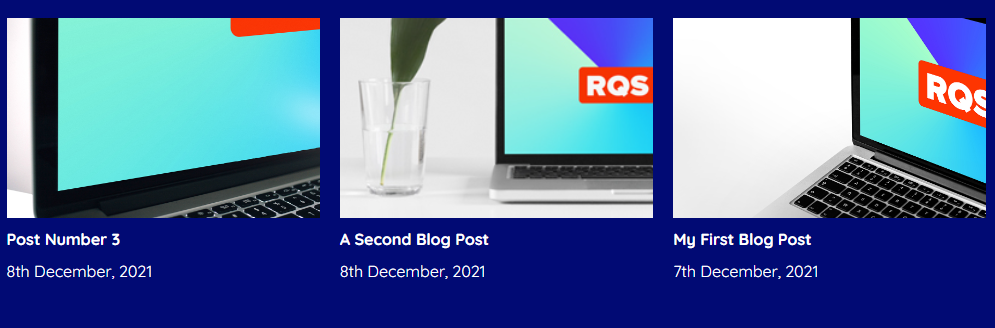
In the below example we have provided our own text within two Text Areas and replaced the remaining Text Area with an Image.
Once you have finished writing your Blog Post, click Finish or click anywhere outside of the edited area.
Editing the Post Title
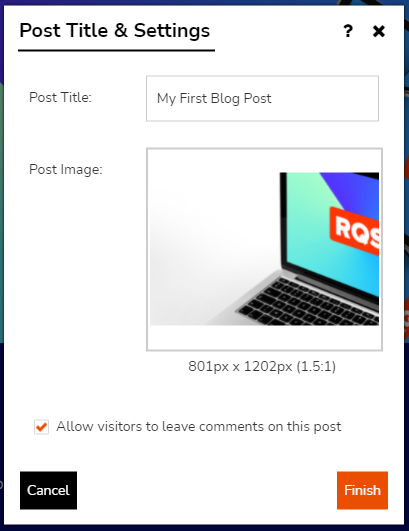
If you would like to edit the Post Title or Image after you have written your Post you can do so by Right-Clicking and selecting Post Title & Settings from the RQS Menu. This will re-open the Post Title & Settings window first seen when creating your Post.
Editing the Post Styling
By default, the Blog Post will use your Site Colour Scheme. However, should you wish to customise this section of your site to make it stand out from the rest, you can do so from the RQS Right-Click Menu. To open this menu, right-click anywhere within the Blog Post Section and choose Section Styling from the menu.

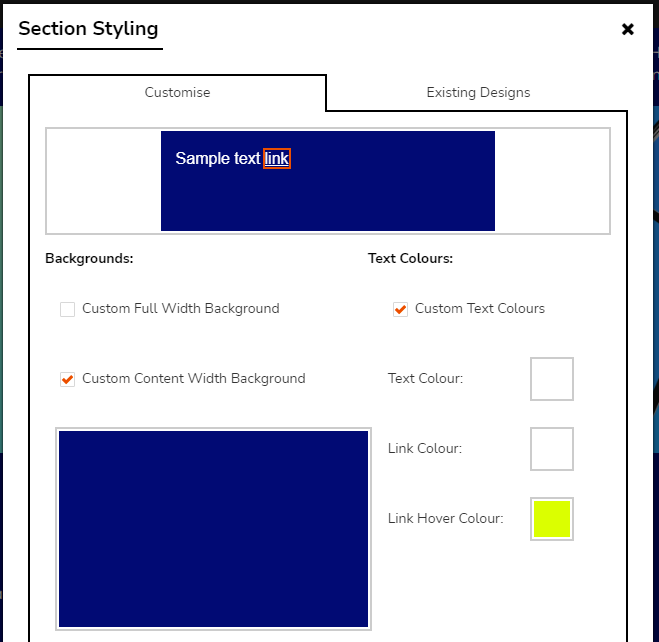
The Section Styling window will allow you to alter several aspects of the Colour Scheme and provide you with a Live preview of your changes before you save these.
Backgrounds: If you would like your custom background to cover the entire width of your site tick the Custom Full Width Background, if you would like your custom background to only cover the Blog Post section of the page, tick Custom Content Width Background.
These options are not mutually exclusive; the RQS Builder allows you to use both options simultaneously, individually, or not at all.
Once you have decided where your custom background will display, click the large rectangle underneath your selection. This will open the Edit Background window.

This window will offer two tabs: Customise will allow you to create a new background using either a solid colour or image and Existing Backgrounds will allow you to choose from a previously created background.
The drop-down menu on the Customise tab provides several options:
Colour Only - This option allows a solid colour background. By default this will be a transparent colour, but you can change this easily by clicking the small colour square.
Image - These options will allow you to use an image as your section or site background. To select your image select Image, this will open your Media Library. You can either select your desired image from this selection, select a Stock Image or use Upload Media to add a new image. You can also change your background colour should your image selection not fill all available space.
Resize to fill area - This option will resize your image to fill your background space completely. This option is not recommended for very small images.
Fixed position sticky image - This option will expand your image to cover the background, but this will remain static when scrolling through the page content.
Centred at original size - This option will set your image central to the content. If the image is too small to cover the entire area, some tiling (or repeating) of the image will occur.
Tile over entire area - This option will repeat your image over the entire background area. This option is recommended for smaller, simple, images.
Custom - If you wish to further customise how your background image displays, this option allows you to do so. Recommended for Advanced Users only.
Once you have made your decision, click Finish to save.
Text Colours: If you would like to use a different colour font in your Blog Post from the rest of your site tick the Custom Text Colours box on this window.
This option will allow you to set a custom Text, Link and Link Hover colour. Simply select the colour block next to each option to open the colour picker.
As the fields on the Blog Comment section will always be white, we would recommend not using white as your text colour for this Page Section.
Other: This short section allows customisation of the Breakpoint (The point at which your content begins optimising on smaller screens) and Padding (The size of the space between the content) of this Site Section.
Unless you have a specific reason to do so, it is recommended to leave both of these settings as Off.
Existing Designs: If you have designed content styling already within RQS you can easily select it from this tab.
Once you have decided on your changes, click Finish to save and close the window. You will now be returned to the editor with your changes in place.
Editing the Comment Introduction
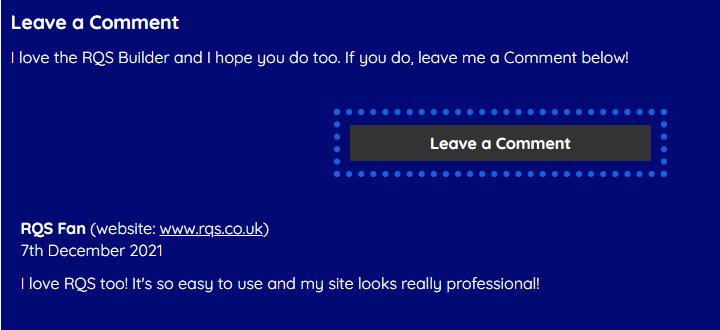
If you have enabled Comments for your Blog Post then your new Post will include a small section intended for a short message to encourage visitors to get in contact. You may find this useful for providing your visitors a brief outline of the information or comments you are hoping to gather from the Comments Section.
To edit this section, Right-Click anywhere within the Blog Post then select Comment Intro Content.
The Comment section of your Blog Post will have, by default, a Text Area, Two Spacer Elements and a Button. However you can also add other elements in the same way as any other Content Section of the site. A full in-depth guide on adding information to this section type can be seen on our Content Section guide.
However, if you wish to simply edit the default text you can do so easily by Right-Clicking the area and selecting Edit Text Area.
Editing the Button
As with any other button on your website you are able to customise the look, behaviour and position of the Add Comment button found within this area.
Moving the Button
To change the position of the button simply 'drag and drop' (or 'click and drag') the element to your desired location. Releasing your mouse button will lock the button to the new location.
Changing the Button Text
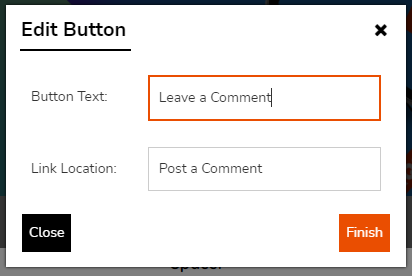
To change the text on the Button, Right-Click the Button then select Edit Button. This will open the Edit Button window, which provides two options:
Button Text - What you would like to appear on your button.
Link Location - What will happen when the button is clicked. As this button allows your visitors to send you their comments we recommend not changing this option.
Changing the Styling of the Button
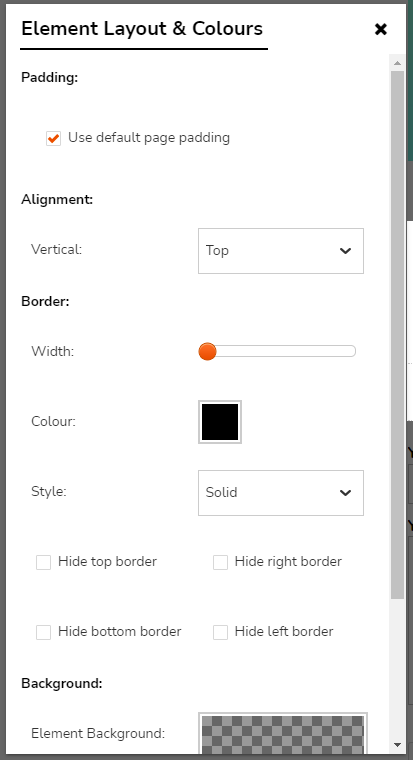
You can also change some elements of how the button looks. To do so Right-Click the button then select Layout & Colours, this will open the Element Layout & Colours window.
This new window will provide several options on modifying your button, which we will explain below:
Padding - This option allows you to 'pad' around the button giving it more, or less, space in relation to the other elements. As this is an advanced setting, we recommend leaving this as default unless you have a specific reason to alter this.
Alignment - How your button aligns with other sections of the Introduction. Unless you have multiple Elements within this Section, this setting is unlikely to have any affect.
Border - These options allow you to enable and adjust a border around your button. The Width, Colour and Style of the border can be adjusted, along with which parts of the Button will display the border.
Background - This section allows you to add a background to your Button Section. If you would like to do so, click the large rectangle within this section (a grey checkerboard pattern by default) to open the Element Background window. While this window allows you to set an image as the Element Background, for such a small area we would recommend using Colour Only.
The colour and corner style of your Button can be set within the Website Styling menus. Our guide on using this menu can be read here.
Once you have finished editing the Comment Section, click Finish or an area outside of this Section to save your changes.
Before your visitor's comments appear on your site, you will need to moderate these. This moderation process allows you to ensure that only content suitable for your site and visitors appear on your pages.
When a comment has been made on your Blog Post you will receive a notification within the RQS Notification Feed and also via email.
![]()
To moderate any comments on your Blog Post either click the Notification Feed Icon in the RQS Menu or Right-Click within the Post and select Manage Comments from the menu.
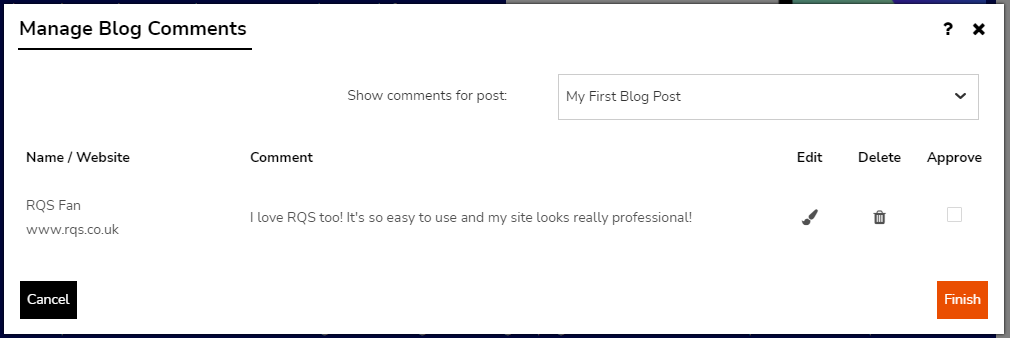
The Manage Blog Comments window will open and show you all comments made on your Blog Post that have been approved or are awaiting moderation.
The Show comments for post drop-down menu allows you to filter the comments for an individual post or for all posts at once.
The window offers 5 columns, regardless of the filtering selected:
Name/Website - This column will display the Name provided by your visitor as well as any information they entered within the optional website field.
Comment - The entirety of the Comment left by your visitor, as it will appear on the site.
Edit - The paintbrush icon allows you to edit the Comment. More details on editing comments can be seen below.
Delete - Clicking the Trash Can Icon will delete the Comment, you will be asked to confirm this action on a separate window. Any Comment deleted is unrecoverable.
Approve - A tick within this column will publish the Comment to your Blog Post. Any Comment without a tick within this column will not display but will still appear within this window.
Editing a Blog Comment
The RQS Builder gives you the opportunity to edit any Comment made within your Blog Posts. To see the options for editing, Click the Paintbrush Icon next to the Comment in the Manage Blog Comments window.
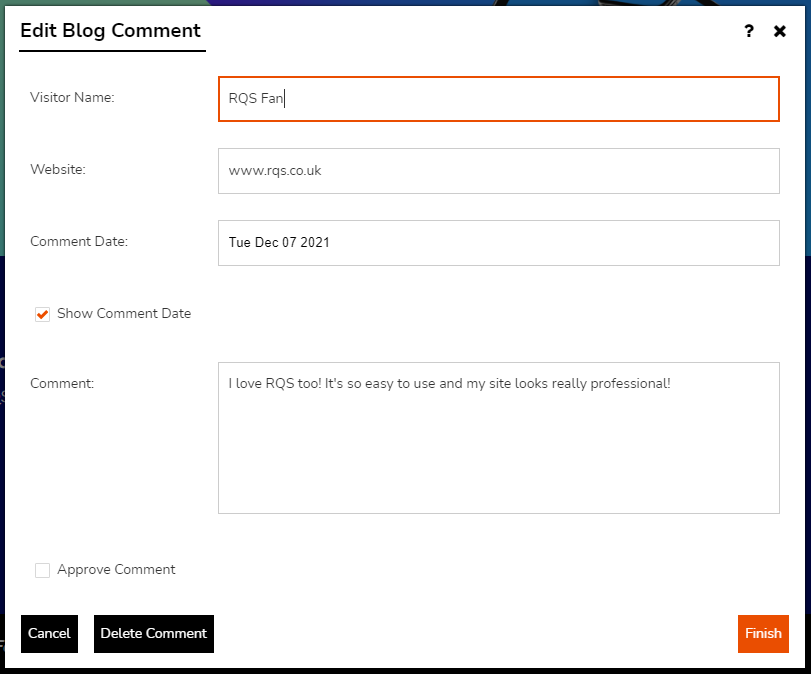
The Edit Blog Comment window allows you to make changes to a Comment made on a Blog Post. Typically this feature is best used to fix any spelling mistakes, or to remove anything you feel is not suitable for your site.
This window allows you to edit the following:
Visitor Name - The information that will appear next to the Name field in the Comment.
Website - The information that will appear next to the Website field.
Comment Date - The Date that the Comment was posted. Clicking into this field will open a calendar allowing you to alter the date of posting.
Show Comment Date - A tick in this box will show the date the Comment was posted, removing the tick will display the Comment with no date.
Comment - The Comment your visitor left. Use this area to edit the post by your visitor, should you so wish.
Approve Comment - Tick this box to enable the Comment to appear on your website. Ticking this box will also tick the Approve box on the Manage Blog Comments window.
If you would like to undo your changes click Cancel. To remove the Comment completely click Delete Comment. Any Comment deleted is unrecoverable.
Click Finish to save your changes and return to the Manage Blog Comments window. From here you can manage your other Comments, or click Finish to return to the editor.
Once you are satisfied with your Post, use the Right-Click Menu and select Return To Blog Page to return to the main editor.
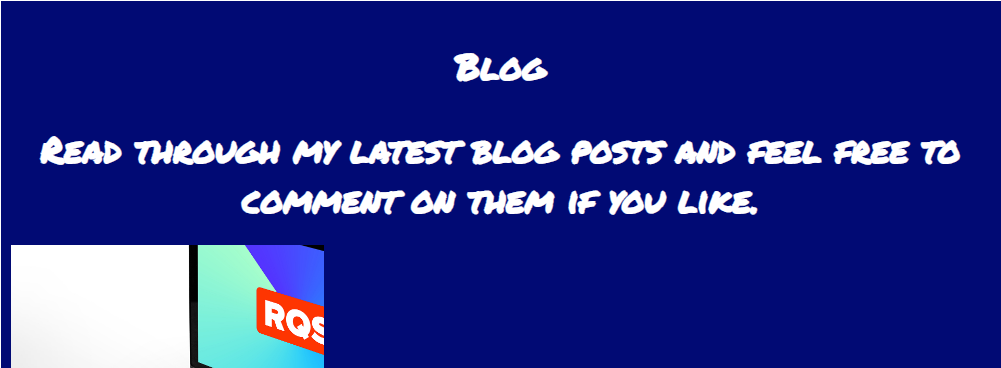
The Blog Section includes a small section intended for a short introduction for the Blog Posts. You may find this useful for providing your visitors a brief outline of the content of your Posts or laying out your intended posting schedule.
To edit this section, Right-Click anywhere within the Blog area then select Edit Intro Content.
The introduction can be edited in the same way as any other Content Section of the site. A full in-depth guide on adding information to this section type can be seen on our Content Section guide.
However, if you wish to simply edit the default text you can do so easily by Right-Clicking the area and selecting Edit Text Area. If you wish to remove the Introduction completely select Delete Text Area from the Right-Click Menu.
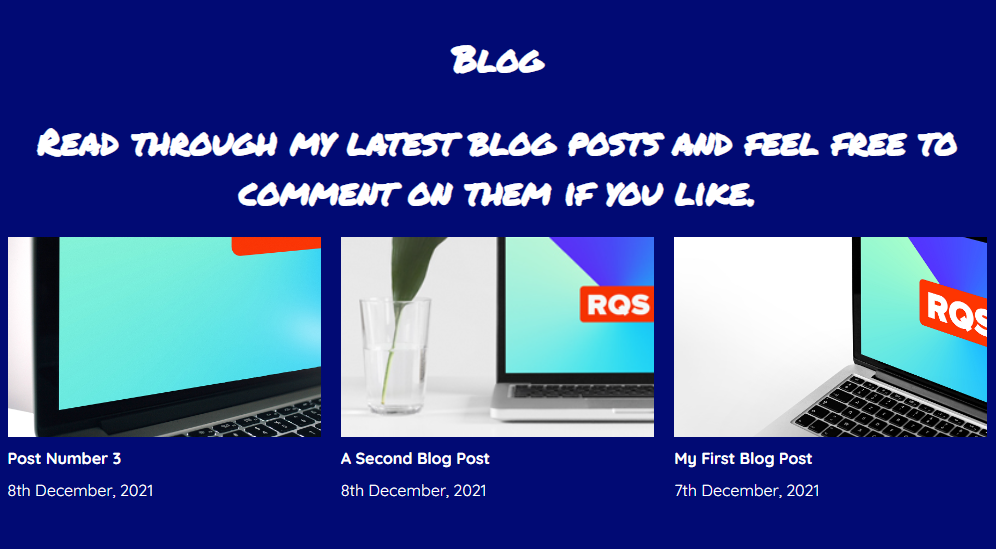
In the example below, we have centre aligned the text and changed the Font Family and Size.
When you are ready to add another Post to your Blog you simply Right-Click within your Blog Section and select Create A Blog Post from the RQS Menu.
This will start the process explained in detail above.
To quickly and easily manage all of your Blog Posts Right-Click within the Blog Section then select Manage Posts from the RQS Menu, this will open the Manage Posts window.
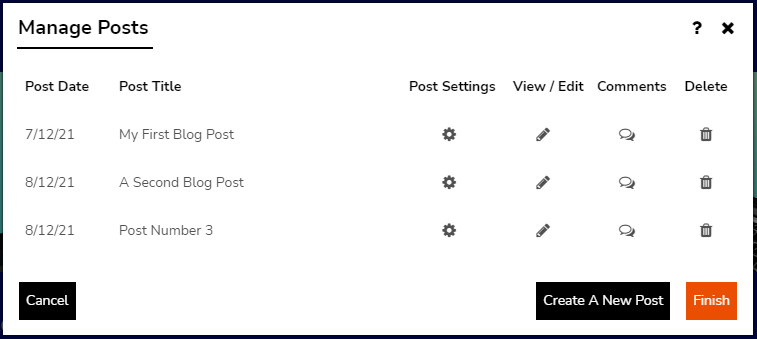
This window will list all created Blog Posts, with the oldest first, as well as four options for each:
Post Settings (Cog Icon) - Selecting this icon will open the Post Title & Settings window, allowing you to change the Title, Image and Enable/Disable Comments on this Post.
View/Edit (Pencil Icon) - This option will take you to the Blog Post from which you can update the content and its styling.
Comments (Speech Bubble) - If you wish to view and moderate any Comments on this post, select this Icon. Details on moderating Comments can be seen here.
Delete (Trash Can) - This icon deletes the selected post. You will be asked to confirm this action in a separate window.
To add a further Blog Post, select Create a New Post. To return to the RQS Builder, click Finish.
As with your Blog Posts the Blog Section of your website can also be customised to use a different Colour Scheme from your site default. To edit these settings Right-Click within the Blog Section then click Section Styling.
An in-depth explanation of the options available on this window can be found above.
In our example, we have made use of the Existing Designs tab, and selected the colour scheme we designed for the Blog Post.
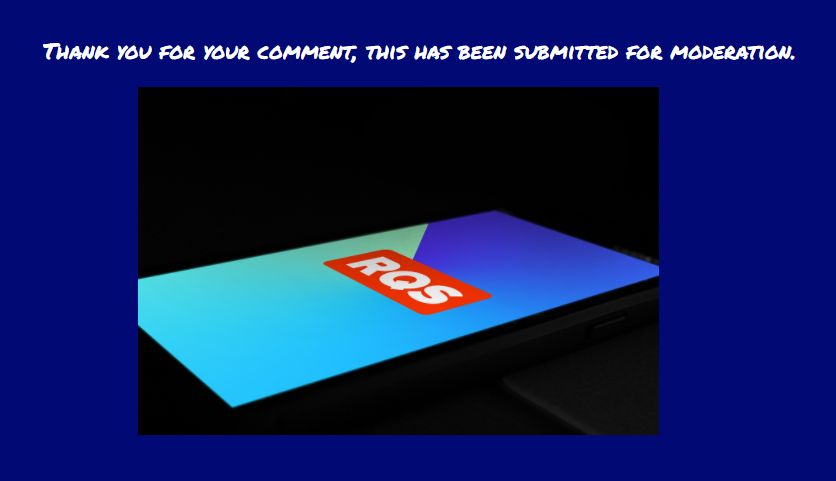
After commenting on your a Blog Post your visitors will be taken to a Thank You/Confirmation Page. This basic page should normally feature a small line of text, typically giving a brief confirmation that the Comment was submitted successfully.
To edit the content or look of this page Right-Click anywhere within the Blog Section then click Go To Thank You Page.
To edit the content of this page Right-Click then select Edit Content. You can choose to keep the content simple, or expand this page with additional Elements.
If you would like to learn how to use Content Sections in-depth, please visit our Using Content Sections Guide.
To edit the styling of this page, Right-Click then select Section Styling. A guide on changing the Section Styling can be seen above.
In our example, we have again made use of the Existing Designs tab, and selected the colour scheme we designed for the Blog Post earlier.
Once you have finished designing this page, Right-Click then click Go To Blog Page.
If you would like to change where your Blog appears on your webpage Right-Click and select Move Page Section from the RQS Menu. This will open a secondary menu that will allow you to move the Section Up, or Down the page.
Live Chat is offline
Live Chat is available:
9:30am to 5:30pm Monday to Friday (excluding bank holidays).
It appears you are using an old browser, as such, some parts of the Freeola and Getdotted site will not work as intended. Using the latest version of your browser, or another browser such as Google Chrome, Mozilla Firefox, Edge, or Opera will provide a better, safer browsing experience for you.