Creating a Links Page
Last updated on by Freeola Support
Important Information
This guide is for the Freeola InstantPro Website Builder. This service has now been replaced by a more modern product, RQS, and therefore is no longer updated with new features.
To build your website in RQS for free, please click here or visit the RQS Builder section of your MyFreeola Control Panel.
A Links Page can be used to link to your own favourite websites or to other companies, to show your visitor what you like, or what may be relevant or useful to them.
Step 1
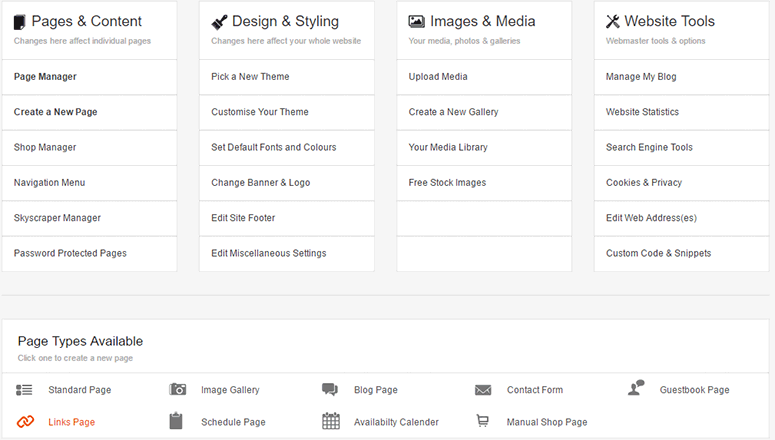
After launching InstantPro, you will be taken to the Main Menu. This serves as the starting point for managing everything on your site. Click Links Page under Page Types Available to get started.
Step 2
Enter your Navigation Text and Page Title. The Navigation Text will be displayed on your site navigation and is also shown in the web address for this page. The Page Title is the text that will appear in the top bar of your browser. Once completed, click the Next button.
Note: There are also some Search Engine Optimisation Options. Take a look at the Search Engine Optimisation (SEO) Tutorial if you're not sure what to put here.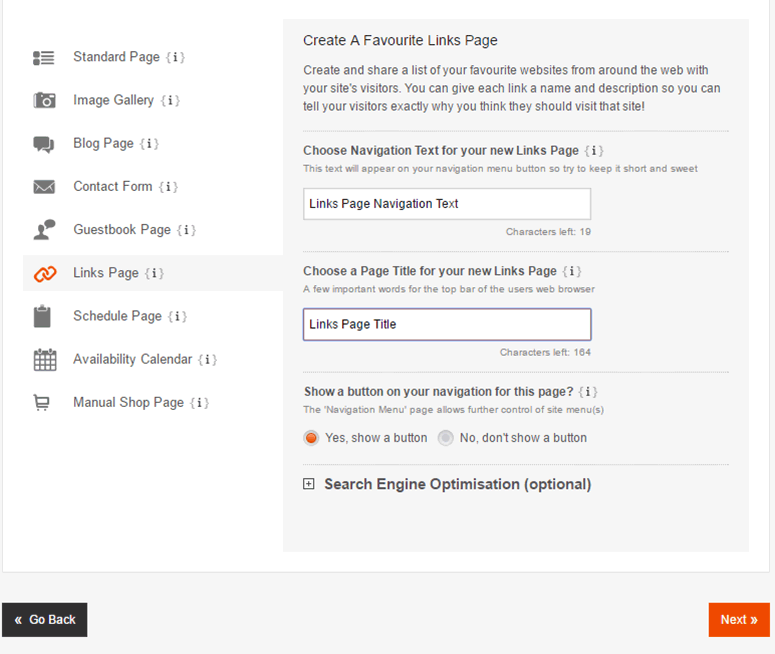
Step 3
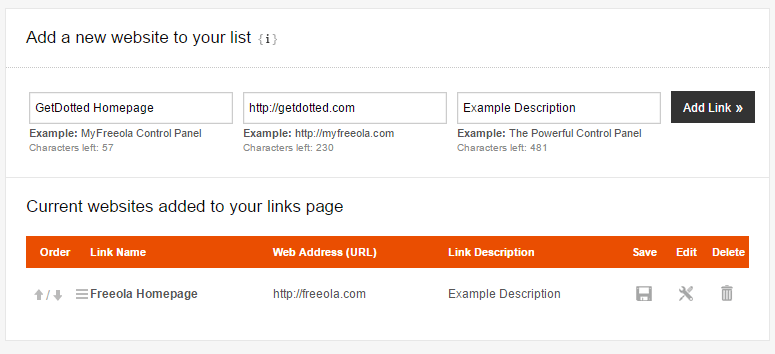
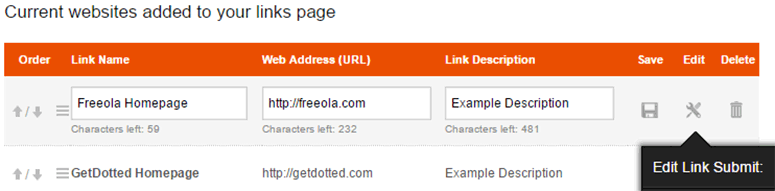
There are 3 boxes, the Link Name, Web Address & Link Description. The Link Name is how the link will display to visitors, the Web Address must be the full address for the page to which you are linking and the Link Description is to describe the content people will find if they follow the link.
Once you have filled in the relevant information, click the Add Link button.
Step 4
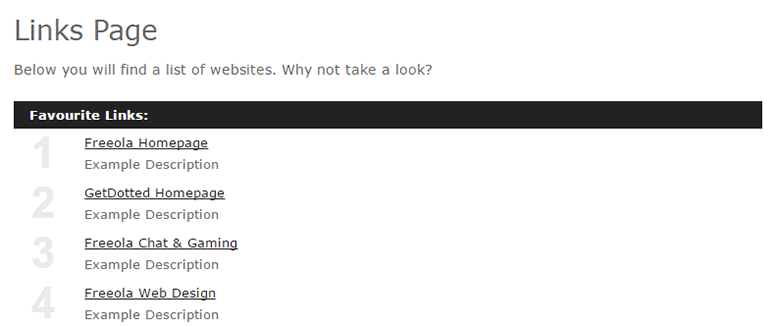
You have now created your first link. To add more links repeat the process. Once you're done, click the Finish button.
Step 1
From the Main Menu, click Page Manager. From there, click the Edit Icon next to your Links Page, this will take you to the settings for your Links Page. Here you can edit or delete your links.

Step 2
To change the order of your links, simply press the Up & Down Arrows next to the link name, or drag and drop them into place. To the right of your links list there are Edit and Delete icons.
Live Chat is offline
Live Chat is available:
9:30am to 5:30pm Monday to Friday (excluding bank holidays).
It appears you are using an old browser, as such, some parts of the Freeola and Getdotted site will not work as intended. Using the latest version of your browser, or another browser such as Google Chrome, Mozilla Firefox, Edge, or Opera will provide a better, safer browsing experience for you.