Adding Google Maps
Last updated on by Freeola Support
2 out of 2 people found this article useful.
Important Information
This guide is for the Freeola InstantPro Website Builder. This service has now been replaced by a more modern product, RQS, and therefore is no longer updated with new features.
To build your website in RQS for free, please click here or visit the RQS Builder section of your MyFreeola Control Panel.
Including a custom Google Map on your site can be a great way to show your visitors where you are based or where you are holding an event. It also means that people can easily get directions.
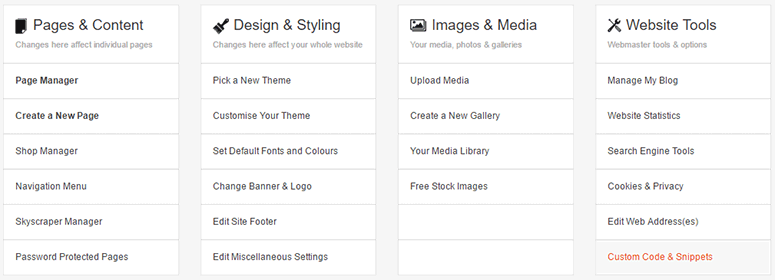
Step 1
From the Main Menu, select Custom Code & Snippets from under the Website Tools heading.
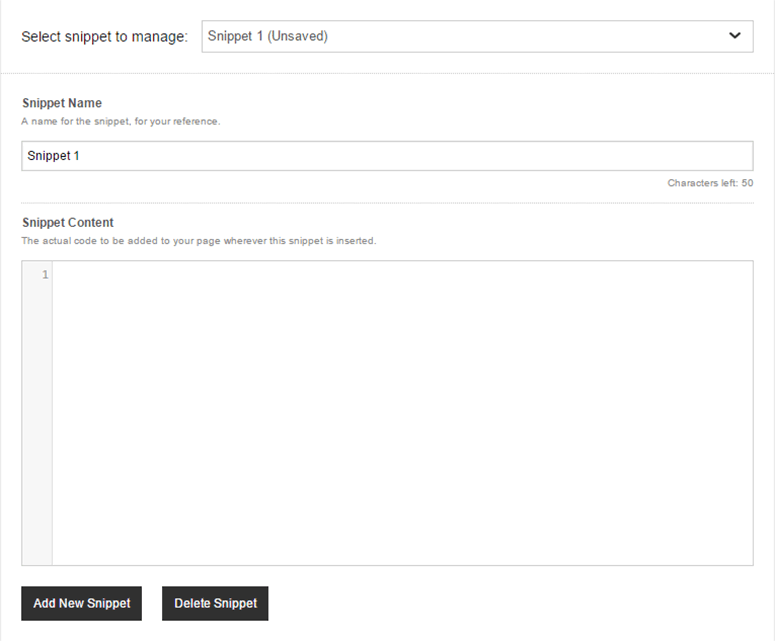
Step 2
Click the Create New Snippet link. Choose a name for your snippet and enter it into the Snippet Name field.
Step 3
Open a new browser tab and to head to the Google Maps Site (or click this link). Then search for the location required.
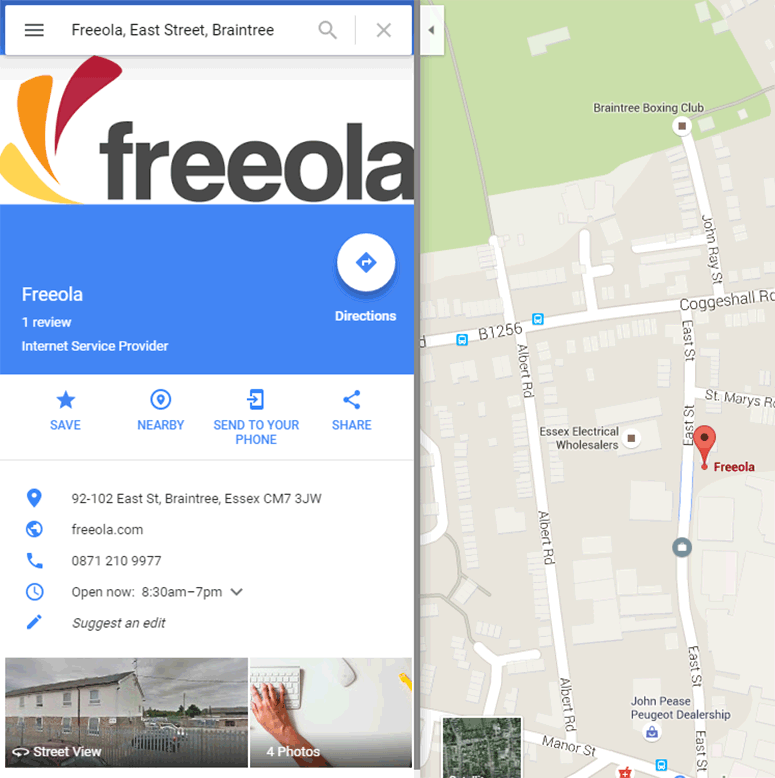
Step 4
When you are happy with the location, click the Share Icon from the menu on the left hand side, and select the Embed Map Tab.
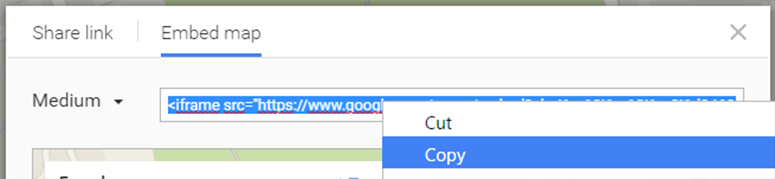
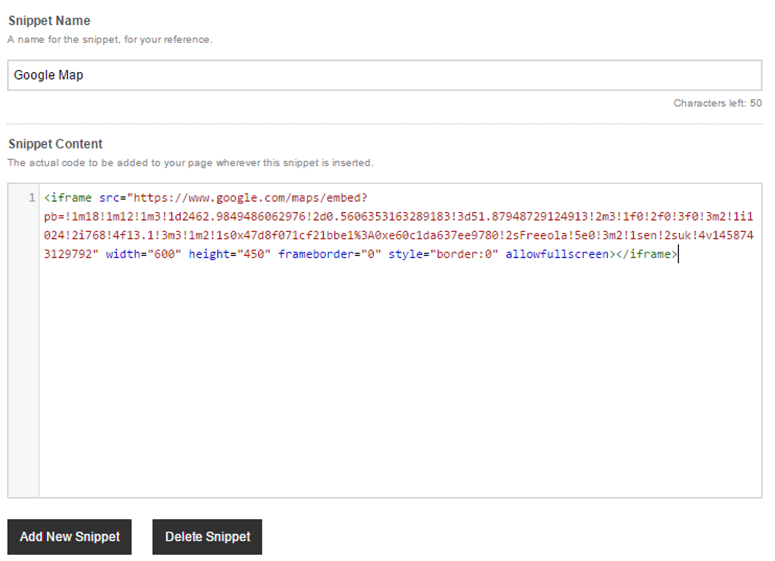
Step 5
Copy the code in the highlighted field. Head back to InstantPro, and paste the code into the Snippet Content box. Once you are happy with the snippet, click Save and then Finish.
Step 6
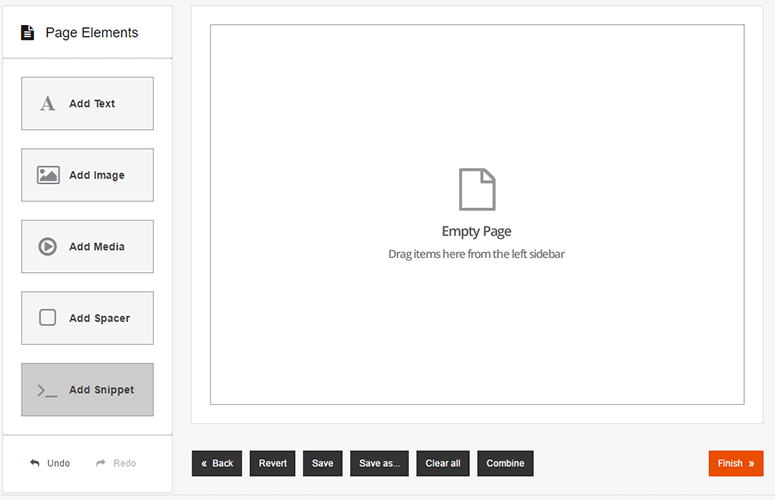
From the Main Menu click Page Manager and Edit the page you want to add the Google Map to.
From the Page Elements section, select Add Snippet and drag & drop it to where you would like it to appear on the page. Double click the box to select your snippet, if you have more than one you can choose from the drop-down menu and press Select.
Step 7
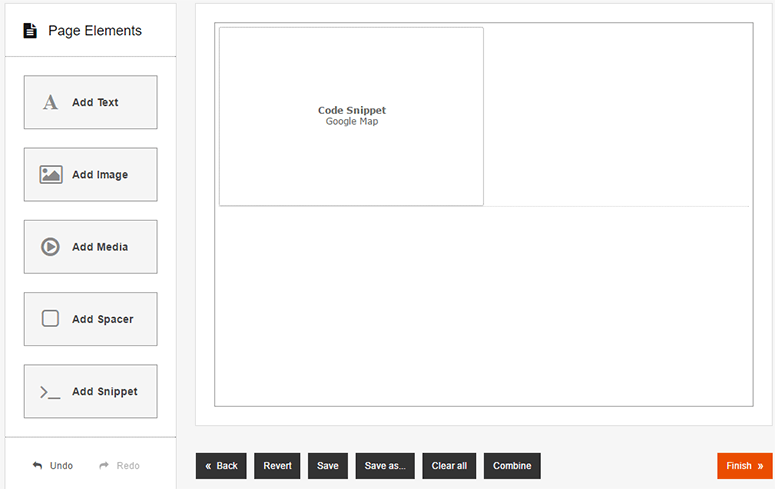
Your Snippet Name will now appear in your snippet block and should look similar to the image below in the Drag & Drop Editor. While it appears like this in the Editor, it should appear as a Google Map on your live site. Once you are happy press Finish.
If you would like to check that the Google Map is displaying correctly on your site, click the View Website link in the InstantPro header and navigate to the page.
Live Chat is offline
Live Chat is available:
9:30am to 5:30pm Monday to Friday (excluding bank holidays).
It appears you are using an old browser, as such, some parts of the Freeola and Getdotted site will not work as intended. Using the latest version of your browser, or another browser such as Google Chrome, Mozilla Firefox, Edge, or Opera will provide a better, safer browsing experience for you.