MySQL Information
Last updated on by Freeola Support
4 out of 6 people found this article useful.
Welcome to the Freeola Internet customer support pages. This guide is designed to give some general information about MySQL Databases. For more internet help topics please visit our main Support Page.
MySQL is a database system which allows you to build extra functionality into your web site. MySQL is extremely powerful, very fast and flexible for a wide-variety of needs. Although only recommended for customers with some experience of online database applications, it is relatively easy to pick up.
MySQL functionality is included with our Freeola MySQL Web Hosting service.
This page provides some basic instructions on how to connect to your Freeola MySQL database and how to administer it using PHPMyAdmin.
This information is for customers connecting to their Freeola MySQL Web Hosting database from a PHP script using mysql_connect or any other Content Management System loaded onto their FTP space.
Database Server: localhost
Database Name: The name you have given to the relevant database
Database Username: The name you have given to the relevant database
Database Password: The password you assigned to the user
If you are unable to remember any of these settings they can be confirmed easily from within your Webspace cPanel (SSD Hosting) or the Web Hosting link found under the Websites & Hosting heading within your MyFreeola account (VIP Hosting).
SSD Pro Hosting
To access your database via the PHPMyAdmin tool firstly log into your cPanel. This can be done through the Manage cPanel option within your MyFreeola account or by visiting www.yourdomain.com/cpanel (where yourdomain.com is replaced by your website address).
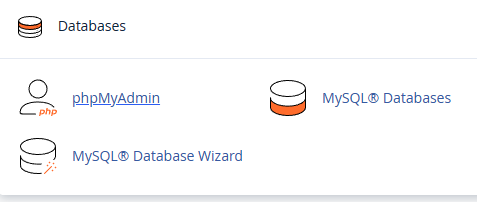
Once logged in, scroll down the the Databases section and click phpMyAdmin.
VIP MySQL Hosting
In order to utilise the PHPMyAdmin utility using the Freeola MySQL Web Hosting service you will be required to visit www.yourdomain.com/vipsqladmin/ (where yourdomain.com is your web address). The username and password required are the Database Username and Database Password set when the database was created.

Alternatively, you can log into any individual database from the Manage link found within the SQL section of your Web Hosting details within MyFreeola.
Please note: Third party clients, such as MySQL Front, will not work with the Freeola MySQL Web Hosting service as all external connections to this server are prohibited.
This information is for customers connecting to their Freedom MySQL database from a PHP script using mysql_connect
Server Address: http://mysql.freeola.net
Database Name: Your MySQL User Name (e.g. sr0123456)
Database Password: Your MySQL Password
With MySQL, Freeola also provides you with PHP MyAdmin which is a professional quality utility used for administering your MySQL database.
Below you will find basic instructions on how to use PHP MyAdmin.
Connecting to your database
The web admin address for your MySQL database is https://mysql.freeola.net. You can connect to your database by logging in to MyFreeola and clicking on the MYSQL DATABASE link or by simply entering https://mysql.freeola.net into your browser, you will then be prompted to enter your Freeola User Name (e.g. sr0123456) and your Freeola Password.Creating a table
To create a table in your database, click on your Freeola User Name in the left hand column. Your Freeola User Name (a seven-digit number that begins with the letters 'sr') is the name of your database. You will first need to give your table a name and define the number of fields the table is to contain. Enter this information in the appropriate fields under the Create new table on database: heading in the right hand column. Click the Go button.Setting the field attributes
In this section you will need to give each field a name, a type and set the maximum character length. Click the Save button. Further information on how to set the field attributes can be found via the Documentation link.Entering data
You will now find the table you just created located under your Freeola User Name in the left hand column. To add data to your table, click on the Insert tab and enter the data in the appropriate fields. To browse the information in your table, click on the Browse tab.Edit or Delete data
You can edit or delete any data in your database by browsing the contents of a table and clicking on either the Edit or Delete link located to the left of each record.Deleting a table
To delete a table in your database, select the table from the left hand column and then click the Drop tab. This will remove the selected table from the database.
Further information on how to use PHPMyAdmin can be found via the documentation link provided within the program.
Live Chat is offline
Live Chat is available:
9:30am to 5:30pm Monday to Friday (excluding bank holidays).
It appears you are using an old browser, as such, some parts of the Freeola and Getdotted site will not work as intended. Using the latest version of your browser, or another browser such as Google Chrome, Mozilla Firefox, Edge, or Opera will provide a better, safer browsing experience for you.