Installing Joomla with Freeola
Last updated on by Freeola Support
4 out of 5 people found this article useful.
Welcome to the Freeola Internet customer support pages. This guide is designed to help with installing using Joomla software with Freeola Hosting. For more Internet help topics please visit our main Support Page.
Joomla is an award-winning content management system (CMS), which enables you to build websites and powerful online applications. Many aspects, including its ease-of-use and extensibility, have made Joomla one of the most popular website software available. Best of all, Joomla is an open source solution that is freely available to everyone.
This software is available on both Freeola SSD Hosting and our older VIP SQL Hosting services.
The Softaculous Installer within cPanel offers the quick and easy installation of Drupal. To access this installer, firstly log into your cPanel by visiting the Websites & Hosting section of your MyFreeola Control Panel then clicking SSD Hosting then Quick Login.
![SSD Hosting in MyFreeola]()
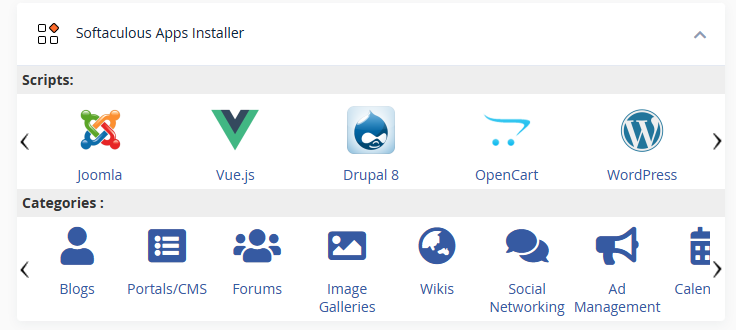
Once logged in, scroll down to the Softaculous Apps Installer section and select Joomla.
![cPanel Softaculous Window]()
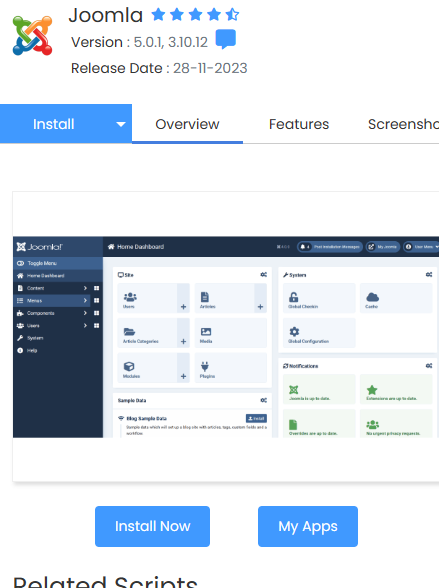
From the window that opens (you can expand to full-screen using the arrows if required) click Install Now.
![cPanel Joomla Install]()
The following page will offer the Joomla installation options. If you are happy with default settings (suitable for nearly all users) click the Quick Install button then Install at the bottom of the page.
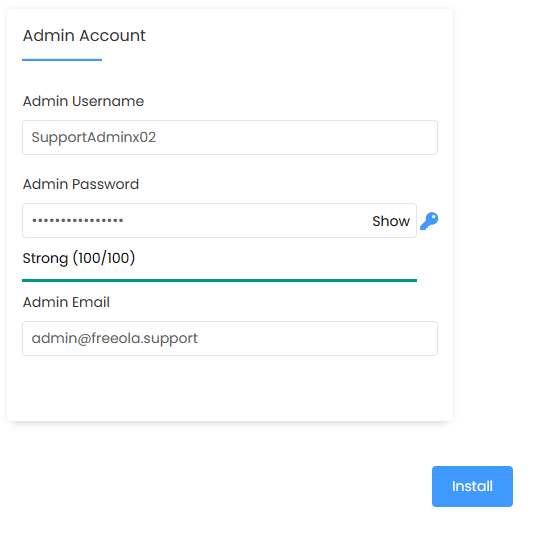
If you would like to customise your Site Name, Description, Administrator Credentials, Language or SQL Settings, select Custom Install before scrolling down the screen to amend these before clicking Install at the bottom of the page.![Joomla Login Details]()
Your admin Username and Password are listed on this page, please note these down as they will be required for the final stage.
It may take a few moments for the software to install in your specified location. Once this has completed, you can finish the installation process by visiting your website (or the sub-folder you installed the software to), with /administrator at the end of the URL.
![Joomla Installation Complete]()
You can now start using your new software.

Freeola's One Click Install service allows the installation and use of Joomla without any manual installation. Our One Click Installers are available to all subscribers of Freeola MySQL Web Hosting at no additional cost and can be accessed from the One-Click Installs link found under the Web Sites & Hosting heading within MyFreeola.
Once on this page select your domain name from the drop-down menu, then Manage One-Click Installs.

While on the Install Software tab (selected by default) select Joomla.
- The Installation Path field should already be pre-filled with your primary web address and should be left as default. Should you so wish, you can install your software into sub-folders.
- An Admin Username should also be created. We would advise something memorable as this will be used to log you into the software management.
Click Install to add the software.
You will now be presented with a confirmation box, click OK to proceed. The software will now be installed.
After being taken back to the One Click Install page take note of the Important Information box as this will confirm your Admin Username and Password, this will be required to log into and administer your software.
To start using Joomla on your website you will now need to visit the admin page and log in. If you left the installation directory as default, this will simply be your website address followed by '/administrator' (e.g. https://freeola.com/administrator) although you can also navigate to this page from the Manage Installations tab on the One Click Install page within MyFreeola.

Once on the page you will be presented with a prompt to login, simply enter your Administrative Details to login and start using your new software.


Live Chat is offline
Live Chat is available:
9:30am to 5:30pm Monday to Friday (excluding bank holidays).
It appears you are using an old browser, as such, some parts of the Freeola and Getdotted site will not work as intended. Using the latest version of your browser, or another browser such as Google Chrome, Mozilla Firefox, Edge, or Opera will provide a better, safer browsing experience for you.